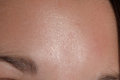
I've ended up with a specular patch of light on a client's forehead. Of course this is a big mistake on my part, but it's also an image they really want. I'm wondering if somebody has a good technique to edit this without getting a blurry blob to replace the specular highlight. I've tried gausian blur, low opacity clone stamp, low opacity paint using the surrounding tones. The result is always an area that looks painted. I would like to paint on only the specular highlights if that's possible, but I cannot get it right.... any ideas??
I've ended up with a specular patch of light on a client's forehead. Of course this is a big mistake on my part, but it's also an image they really want. I'm wondering if somebody has a good technique to edit this without getting a blurring blob to replace the specular highlight. I've tried gausian blur, low opacity clone stamp, low opacity paint using the surrounding tones. The result is always an area that looks painted. I would like to paint on only the specular highlights if that's possible, but I cannot get it right.... any ideas??
i would also be intewrested in seing how this can be fixed:)
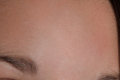
I used the clone tool with a big brush and varying amounts of opacity and flow. I used it in normal mode and just messed around until it looked OK. I would imagine in context of the entire image you will not be able to see the edit.
I would have done basically the same as thegrandwazoo.
But then I would have created a new layer, added some noise, reduced the opacity until I thought it looked good, then masked only the area I wanted to keep. Reasoning: Often "healed" skin is too smooth.
I'm not a pro, but one way I've found to fix this is paintbrush set to 'darken' mode, opacity at 12-15%, sample color (alt-click) of darker shade of forehead, then paint over effected area. Pretty effective and very easy.
I'm not a pro, but one way I've found to fix this is paintbrush set to 'darken' mode, opacity at 12-15%, sample color (alt-click) of darker shade of forehead, then paint over effected area. Pretty effective and very easy.
[thumb]607672[/thumb]
Here's my attempt. 2 min pp
I've found that masks are good for things like this. Lasso the area you want to edit. Feather a bit. Then do a curves adjustment layer. That will create a mask for just the area you picked. Lower just the brightness of the area. I copied the mask. Used luminance for the blend mode because that shouldn't change the color to much. Merge the 1st mask to the original, then repeat the curves a little more for the 2nd. Blended again & merged. I didn't do any additional work to the edge of the mask, but you'd want to to get a smoother blend. You keep the texture of the skin this way. Just keep lowering the brightness bit by bit till you have the tone you want. You don't want to make a big adjustment in just one step.
I use Leroy's method sometimes but for a patch that big, I use the patch tool (ironically enough), but usually first use the selection lasso with some feathering, make a selection on a portion of the area, switch to the patch tool and move the selection to a neighboring "good" patch of skin that looks close to what I want. Repeat for the various parts of the area you want to fix and just work it til it looks good. Here's my quick edit:
Really there are so many ways to fix different issues - you just find one or a combination of methods that work for that particular project.
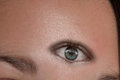
If all else fails, there's always the ever-popular third eye option - it distracts from the flaw itself. :P
how many photos of the client did you take, would it be possible to take a forhead from a different photo and merge it into this one? they will never know, it would be creepy though, "yea i put your sisters boyfriends forhead on yours to cover up the lightspot":P i hope you like it
I use Leroy's method sometimes but for a patch that big, I use the patch tool (ironically enough), but usually first use the selection lasso with some feathering, make a selection on a portion of the area, switch to the patch tool and move the selection to a neighboring "good" patch of skin that looks close to what I want. Repeat for the various parts of the area you want to fix and just work it til it looks good. Here's my quick edit:
Really there are so many ways to fix different issues - you just find one or a combination of methods that work for that particular project.
If all else fails, there's always the ever-popular third eye option - it distracts from the flaw itself. :P
Thanks all for the responses. I applied the techniques suggested here and eventually found the right balance for this particular image. Please let me know if I can ever return the favor :-)