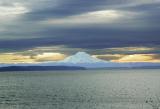
Acutally I am currently out in Yellowstone and experiencing the same issue as Spirit did. The tetons were quite hazy yesterday and some of my shots have a large amount of haze to them. Whats the best way to compinsation post processing for haze?
BTW, Spirit nice shot.
Thanks
Rich
Here is one of the shots, not the greatest but it gives you an idea of what I saw. Like spirit just a ton of haze:
I kinda like the effect of haze. However, you might try using Selective Color and increasing the amount of black in the colors of the mountains. Also, fool around with levels and curves to enhance the contrast.
If using Photoshop and have the Curves adjustment, select a centerpoint and then drag the shadows (lower half of the line) down a smidge. This will darken the shadows and brighten the highlights in a subtle way and boost the contrast overall. Great haze remover.
I gave it a try just for fun. I'm fairly new to photoshop, so I'm sure others could do better, but here it is anyway.
Adjusted contract seperately for the sky, mountains, forground/trees.
Boosted the saturation a bit.
Added a slight gradient to the sky.
Did a bit of burning on the fence and in the grass.
Cloned out some of the nast!
I ran Neat Image on it. After that, I adjusted the highlight and shadow settings, adjusted the levels, cloned out your smudges (which were either on your lens or the image sensor), and finally, USM'ed it.
By the way, I used Photoshop Elements, not CS2. And, I did this very quickly. If I had more time, I would have created separate adjustment layers and a layer mask to darken the sky a bit (and possibly the mountains, too).
The sun was directly behind us when we were shooting this shot. I really dont understand why the circ pol had no effect on the shot. I tried dialing it in and this was the best I could get through the haze.
Try applying USM with a large radius - experiment with between 20 and 100 - and a small amount like 15-30%. Limit it to the mountains by using a mask with a feathered edge.
---to---> First was to go Image, Adjustments, Levels, Options, (both boxes set to 0.5 clip in shadow & highlights, saved as default here), then faded back the levels a bit.
Then I made a new later via copy, dragged a box on upper portion of image to include a bit of the foliage, did a white balance adjustment and a brightness/contrast adjustment, erasing back the edges along the foliage, and flattened layer.
Made a small overall contrast/brigtness adjustment, then made a new layer again, did a black & white conversion, edit, fade, brought back the slider until I liked the overall tone of the mountains, then adjusted levels again, watching only the mountains. Erased back the sky and foreground.
Ran neat image, made some adjustments to the blue & cyan channel in slective adjuustments to include adding a touch of yellow to cut down intensity and saturation, did some manual sharpening of the mountains, did a little shadow burning at 2% on the mountains, and yes, cleaned up the dust bunnies. I didn't spend much time on this, nor really concerned myself a lot with the foreground and foliage, was more concerned with the mountains. The sky still needs some work, but whaddaya want fer free :)
I think it took longer to type & proof this than it did to edit... Just a quick edit to hopefully head you in a new direction.
The sun was directly behind us when we were shooting this shot. I really dont understand why the circ pol had no effect on the shot. I tried dialing it in and this was the best I could get through the haze.
Rich
A polarizer has close to zero effect if in line with the sun and the most effect if shooting 90 degrees to the sun.
Use masks along with Curves to separately adjust the ground and sky areas (see example below, which used three masks/curves, for earth, sea and sky).
After making all the adjustments you want, try "enhancing the contrast" using the Unsharp Mask filter with a low amount but high diameter setting, something like this:
Amt 15%/Dia 50 pixels/Threshold = 0
Yea I know I had a dirty sensor, thats why I said not the best of shots. DoctorNick, could you show me how that came out?
Strangeghost- I tried it and it cleared up a lot of the haze thank you. ...
For the sake of clarity, both DoctorNick and Strangehost have given you equivalent methods. The curve adjustment (centerpoint fixed, shadows down a bit, highlights up a bit) is exactly what duplicating with Overlay mode does. Curves, of course, gives greater control because you don't have to have the fixed point in the middle.
I'm amazed at how many ways have been suggested to reduce haze in a shot like this. It'd be great if someone put together a list of tips for basic stuff like this, similar to mk's unofficial site FAQ.
General- Thanks for the suggestions, I will try that. My wife says she likes the oval appearance of the shot, great shot.
Thanks -- I'm glad someone does! I've had doubts about it myself, but I wanted to focus on the the mountain, and it looks a lot smaller without the vignette.
It was roughly 9:30am when we took the shot Dr.Achoo..... The Sun always seems to be the problem for me, I cant tell you how many times I gotten harsh lighting comments, but I shoot when I can. I dont know how you guys get the shots you do mid-day. I am amazed most of the time by them.