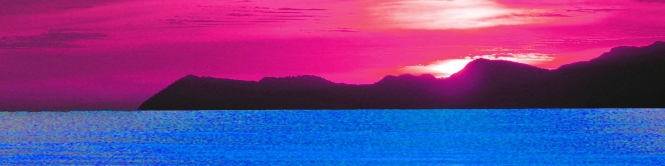
There do seem to be scenes that just cry out for a long-format image. When I can, I will use stitching to achieve the long format. My usual M.O. is to shoot in portrait orientation to maximize resolution vertically, and shoot five or six shots, which allows me to do a 3:1 ratio. I find that ratios between 3:1 and 3.6:1 are my most commonly-used.
My usual M.O. is to shoot in portrait orientation to maximize resolution vertically, and shoot five or six shots, which allows me to do a 3:1 ratio. I find that ratios between 3:1 and 3.6:1 are my most commonly-used.
Thanks for your reply. It does, however, bring me to ask a few other questions.
If you are shooting in portrait orientation and taking 5 or so shots, what lens would you use?
Is there a stock standard aspect ratio for panorama?
If you are shooting in portrait orientation and taking 5 or so shots, what lens would you use?
Most often I use a 24-70 zoom, so equivalent to 15-43 in APS-C terms. There is no real limit on the long end though, whatever works for the scene. Very short focal lengths get difficult to stitch, and you need very good control of rotation around the entrance pupil, as well as a low-distortion lens.
Originally posted by johnbrennan:
Is there a stock standard aspect ratio for panorama?
Not really. Whatever works for your final destination.
Originally posted by johnbrennan:
What Angle of View would you end up with?
When shooting at 24mm, it's pretty easy for me to get 180 degrees of coverage; that takes 5 shots with 25% overlap.
Print sizes are usually "even" (i.e.2:1, 3:1,4:1) ... after cropping I usually add a border to bring it to one of these standard print sizes.
If you are stitching multiple images then you can also make more than one horizontal pass to gain height (depending on stitching software -- I use the demo version of AutoStitch). For example, make one set with the horizon 1/3 of the way from the bottom and another with the horizon 1/3 of the way from the top.
You will probably get the least distortion with a "normal" lens (50-100mm); you can zoom in closer but it takes a ton of images that way.
Print sizes are usually "even" (i.e.2:1, 3:1,4:1) ... after cropping I usually add a border to bring it to one of these standard print sizes.
Thanks for those print sizes. I guess 3:1 would probably suit me best.
Paul, I do have a question for you specifically. You produce a number of images with borders. Can't you just crop to size with no border?
When your images are framed there will be a border there anyway, won't there? Having said that a local printer said that he places a 5mm border on the images that he prints.
Very short focal lengths get difficult to stitch, and you need very good control of rotation around the entrance pupil, as well as a low-distortion lens.
I find that very helpful, thank you.
Originally posted by kirbic:
When shooting at 24mm, it's pretty easy for me to get 180 degrees of coverage; that takes 5 shots with 25% overlap.
Print sizes are usually "even" (i.e.2:1, 3:1,4:1) ... after cropping I usually add a border to bring it to one of these standard print sizes.
Thanks for those print sizes. I guess 3:1 would probably suit me best.
Paul, I do have a question for you specifically. You produce a number of images with borders. Can't you just crop to size with no border?
After going to all that trouble to acquire image area, I don't want to crop away any just to make it fit an arbitrary print size.
The same with my single images, which are in the usual 4:3 aspect ratio; they don't fit any standard print size, and I'd rather add a border up to the next-largest size than crop away and print smaller (or have to re-sample up).
After going to all that trouble to acquire image area, I don't want to crop away any just to make it fit an arbitrary print size.
My sentiments exactly!
I agree strongly with Paul that adding a border is a better solution than cropping when we want to match a digital file to a specific print aspect ratio. For panoramas, I'm not really seeing the need to do much of that. They are pretty much custom print sizes as it is, so I can use almost any aspect I choose. The only reason I would pad with border is to accommodate framing needs. Even then, that can be done as well with matting for a traditional frame.
My other reasons for adding borders ... I come from a graphic design background, and I can relate strongly to the "starving student" lifestyle. Since matting/framing a print can cost ten times more than the image, I want people to be able to just tack it on the wall like a poster if they can't afford a frame. I also usually add title and copyright info -- if they want to cover that with a mat they can.
My other reasons for adding borders ... I come from a graphic design background, and I can relate strongly to the "starving student" lifestyle. Since matting/framing a print can cost ten times more than the image, I want people to be able to just tack it on the wall like a poster if they can't afford a frame. I also usually add title and copyright info -- if they want to cover that with a mat they can.
Another reason... some framing options like gallery wrap or frameless on acrylic work really well with borders.
My sentiments exactly!
I agree strongly with Paul that adding a border is a better solution than cropping when we want to match a digital file to a specific print aspect ratio.
If you are stitching multiple images then you can also make more than one horizontal pass to gain height (depending on stitching software -- I use the demo version of AutoStitch). For example, make one set with the horizon 1/3 of the way from the bottom and another with the horizon 1/3 of the way from the top.
Not sure what you mean by this Paul.
I downloaded AutoStitch and sometimes it works and other times it provides me with an irregular shape. Small at one end, large at the other. It seems to be hit and miss.
I took my first panorama shots today. I shot vertically (Portrait) and managed to stitch 5 together successfully, but when I try to add a sixth, all hell breaks looks.
Is there something in the settings I should know about?
I always have to recommend the stitcher that I use, which is PTGUI. the downside with PTGUI is that it is rather expensive, but there is no better stitcher IMO. Multi-row, 360 degree, gigapixel, you name it, PTGUI can do it, and will do it faster than the majority of stitchers. PTGUI can be a daunting program in Advanced mode, but in the default mode it is dead easy.
ETA: John, what Paul is referring to is a multi-row pano, where you take two (or more) rows of photos with each row vertically overlapping. I rarely do this, but I do find it very useful when I want some extra height on very long panos.
AutoStich will give you an irregular shape when the angle/perspective changs a lot, for example when panning vertically up a tall building. I think it tries to keep the object shape intact, so shots of the top of the building get stretched horizontally so that the sides of the building are vertical and not converging.
Also, the newer (64-bit) version seems (to me) to have both fewer and more confusing controls over things like specifying if the image is in portrait or landscape orientation; I'm still (mostly) using the 32-bit demo version.
Is there a limit to the number of images that AutoStich will accept in one process?
It is probably memory-dependent -- in the 32-bit version you can allocate more memory than the default. On their demo/download page the (second) example uses 57 images, not all of which are perfectly horizontal or precisely exposed -- it has options to help correct both of those ...
And if you like it there are at least three commercial programs which incorporate the AS technology but with (I presume) better interface/controls.
ETA: The big limit to the demo version it it only works with JPEGs -- since that's all my camera shoots it doesn't bother me, but it is a limitation ...
It's possible that because I shot vertically, AutoStitch has a problem deciphering. I've even tried just 4 images and the end result is of similar style to that of the posted image.