Hi all,
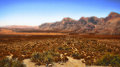
Went sightseeing near Las Vegas on a ridiculously clear day at the worst possible hour. *sigh* I don't usually go too crazy editing point'n shoot clicks but this one keeps pulling me back.
Steps: Other than crop and some basics I used Topaz Lens Effects - UV Haze, and Topaz Adjust to darken features a bit. I'd appreciate thoughts from the experts so I can learn (and stop playing with it!). :)
Many thanks in advance for any and all (positive and constructive) feedback.
I don't think it's that bad, light-wise. It accurately shows a clear desert scene during the day.
+1
I too think it is a pretty accurate photo of a desert scene. Not all scenery is vibrant colors. When I looked at your image, I could almost feel the desert warmth and dryness.
I don't think it's that bad, light-wise. It accurately shows a clear desert scene during the day.
+1
I too think it is a pretty accurate photo of a desert scene. Not all scenery is vibrant colors. When I looked at your image, I could almost feel the desert warmth and dryness.
Good points. Accuracy is definitely a desirable feature. I do like the colorized versions as well for something fun to look at. I'll have to try that out.
I would never be happy with an image that I doctored to that extent.
I tend to agree. I like realism in landscapes which is why I struggle to edit them as I tend to go a little too far. Learning to watch my colors so that I don't correct too blue or introduce incorrect tones. Thanks!
I guess I'm kind of lazy and old-fashioned, so I pretty much stick to using Curves and the UnSharp Mask filter for most of my editing. I agree the original didn't need much.
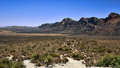
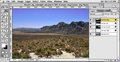
The first version just uses a basic Curve on the RGB composite channel, the second uses separate Curves to the foreground, moutains, and sky through masks (see screen-shot). The masks were simple to make: used the Magic Wand on the Blue channel to select the sky (pretty uniform and separate from the ground), saved the inverted selection for the FG mask, then erased part of it over the mountains and combined selections to create the center mask.
Both then had "high-radius" UnSharp Mask applied: Amt 12%, radius 48px, threshold = 0, which helps accentuate the contrast.
Here is a version for those who are less firmly attached to landscape as always needing to involve realistic documentation. It was interesting to approximate an oil painting effect with Topaz Impression. I haven't had this plug in very long, so much learning remains while having fun. Of course, this is off limits in DPC challenges such filters are too much "effect" to pass muster. Too far from "photography" for most of us. This could get old after a few images, but I may continue to play with it for a while.
I guess I'm kind of lazy and old-fashioned, so I pretty much stick to using Curves and the UnSharp Mask filter for most of my editing. I agree the original didn't need much.
Thank you! I really like #1. Trying a couple of tips as I edit my annual photo slideshow for my parents. Clearly I need to reread the tutorials on USM and practice some more. :+)
Here is a version for those who are less firmly attached to landscape as always needing to involve realistic documentation. It was interesting to approximate an oil painting effect with Topaz Impression. I haven't had this plug in very long, so much learning remains while having fun. Of course, this is off limits in DPC challenges such filters are too much "effect" to pass muster. Too far from "photography" for most of us. This could get old after a few images, but I may continue to play with it for a while.
I like the effect on the plants but not as much on the mountains and sky. Artistic filters are definitely fun. Every so often I run a pic through to see what happens. I think a canvas print that looks like it was painted would be cool. :)
I guess I'm kind of lazy and old-fashioned, so I pretty much stick to using Curves and the UnSharp Mask filter for most of my editing. I agree the original didn't need much.
Thank you! I really like #1. Trying a couple of tips as I edit my annual photo slideshow for my parents. Clearly I need to reread the tutorials on USM and practice some more. :+)
Well, this involves the simplest adjustments of all: an "S"-shaped Curve to improve contrast (and thereby mid-tone detail) and the high-radius USM technique, which acts like a "clarify" filter to also help apparent contrast/detail. Be careful with it as it can blow highlights or block shadows if you have a lot of (important) detail at the ends of the tone range.
A worthwhile experiment might be to take this image and create a selection for half of it, and then apply these adjustments to just one part so you can see the differences side-by-side.
Well, this involves the simplest adjustments of all: an "S"-shaped Curve to improve contrast (and thereby mid-tone detail) and the high-radius USM technique, which acts like a "clarify" filter to also help apparent contrast/detail. Be careful with it as it can blow highlights or block shadows if you have a lot of (important) detail at the ends of the tone range.
A worthwhile experiment might be to take this image and create a selection for half of it, and then apply these adjustments to just one part so you can see the differences side-by-side.
Added to my list of photo editing homework assignments. :) Thanks again!!!