I wonder if anybody has any advice for making a frame out of reclaimed wood. I went to our local recycler store (read: semi-organized junkyard) and found a fifteen foot piece of 1x10 with some great distressed paint on it. I would like to use it for a frame for a massive panorama (shot to be determined) a la Peter Lik. I post a picture of the wood in a bit.
Has anybody tried this before? I'm guessing I'll need a router bit to cut the rabbet. I'll use plexiglas for weight and safety issues. Best way to fasten the plexiglas to the frame? This should be a fun project and I'm hoping to get a worthy shot Wednesday evening of a feature called Thor's Well on the Oregon coast.
Hmmm, I'd probably have to use a ton or I'd be afraid of the thing falling out due to the weight. I'm hoping to get it in the neighborhood of 3x6 feet.
remember if you mitre the corners will be longer, 15 foot is going to struggle to do a 3x6 hehe
i built some frames for smashed guitars from my teching days and i used a router to rebate a notch for the glass, but then took the glass out as its more fun ppl touching them
One point evert 6-8 inches should be plenty to hold the 'glass and picture into the frame -- remember that most of the weight is borne by the rabbet supporting the bottom edge. There must be versions made specifically for this purpose (perhaps with a wider flange -- you're not covering these with putty) -- why not just go to a framing shop and buy the right thing?
Cool idea, and a nice find in that piece of wood :-)
At your intended size, there are a couple of concerns that come to mind:
- The tendency of the plexiglass to bow. You'll need to ensure that you use a thick enough piece to avoid it bowing excessively
- How to constrain the photo against the plexiglass?
I'm thinking one answer to the second concern, which addresses your concern as well, is to use a backer board that overlaps the frame, rather than one that sits in the rabbet. You've got 3/4 inch of frame thickness so you could screw the backer to the frame.
No matter how you look at it, the total package is going to be quite heavy! good luck on the project and keep us posted on progress.
Wouldn't a frame with a 3'x6' outer dimension would require about 18' of material and more for an opening that big? Not allowing for saw kerfs and assuming perfect 45 degree miters that is.
Assuming that you want the unpainted part along the edge of the board to be continuous around the frame, the best you can hope for is a outer perimeter equal to the length of the board. At a 2:1 aspect ratio, that means a 5'x2.5' outer perimeter with the inner opening of (5'- 2*board_width)x (2.5'- 2*board_width). Your actual dimensions will be a bit smaller due to the saw kerf, but that could be minimal. You might want to plan for something a bit smaller to allow for recutting miters, unless you really kick ass with cutting perfect miters.
I'd cut a stepped rabbet for the plexi and photo/mat and secure the plexi by holding it in place with strips of wood nailed around the perimeter. You want the panel to "float" in the frame to allow for differences in expansion. Otherwise thngs might buckle...that's not a good thing. Then hold the image/mat/backing in place with framing points.
Sorry, I wasn't clear. I'm going to rip the wood in half. A 10 inch wide frame is a bit too thick. :)
Fritz, thanks for the ideas. The backer board might be a good idea. Jenn wants it without a mat so it looks like the rabbet will only need the depth of the plexiglas. I like the idea of the strips of wood holding a "floating" plexiglas as well.
Any ideas on gluing the miters together? The corner vices I have won't handle anything this big and I'm not sure I want to go out and buy some specialized equipment for it.
Sorry, I wasn't clear. I'm going to rip the wood in half. A 10 inch wide frame is a bit too thick. :)
Fritz, thanks for the ideas. The backer board might be a good idea. Jenn wants it without a mat so it looks like the rabbet will only need the depth of the plexiglas.
Any ideas on gluing the miters together? The corner vices I have won't handle anything this big and I'm not sure I want to go out and buy some specialized equipment for it.
When my husband did this (though he was framing mirrors, not pictures) he used some type of inset screw and filled the hole with some type of putty. I believe it was stilled glued as well. He's not home to ask though.
when ive done it weve never used those fancy corner things, we use the bigger 50' long, 2" wide rachet straps round shuttering for concrete pads quick and easy way of doing it.
over here a set of 4 of those little straps can be had for £5 in any hobby/camping shop etc
Any ideas on gluing the miters together? The corner vices I have won't handle anything this big and I'm not sure I want to go out and buy some specialized equipment for it.
I would use a biscut joiner, they are pretty handy to have, or you may be able to rent one in your area. The other option is to cut in a spline and pop a few dowels to secure it and for pretty. Or you could skip the miter, go crude to match the look of the distressed wood, and use a simple half lap joint and secure it with through dowels.
I f you may be doing this a few times, buying 4 Jorgensen's 9166 90° Corner Clamps is worthwhile. The Pony version is just as good, but these guys are one of those tools that once you have them you wonder how you lived without them.
Any ideas on gluing the miters together? The corner vices I have won't handle anything this big and I'm not sure I want to go out and buy some specialized equipment for it.
I second the biscuit joiner suggestion for the miter joints. You simply can't beat it for ease and strength. I have the Porter Cable version, but I see a lot of cheaper knock-offs at places like Harbor Freight.
I think the ratchet strap idea is what you want for the glue-up. Any old ratchet strap will do. There are ones that are used to tie down loads, for instance. Just place blocks near each corner, run the strap around the outside of the eight blocks and tighten it up.
I also think that it might be a good idea to provide some additional mechanical strength to the frame. For something this size I wouldn't count on the glue alone. I like the idea of a recessed screw; one or two at each corner in a vertical orientation should be all you need.
I think the ratchet strap idea is what you want for the glue-up. Any old ratchet strap will do. There are ones that are used to tie down loads, for instance. Just place blocks near each corner, run the strap around the outside of the eight blocks and tighten it up.
I also think that it might be a good idea to provide some additional mechanical strength to the frame. For something this size I wouldn't count on the glue alone. I like the idea of a recessed screw; one or two at each corner in a vertical orientation should be all you need.
The strength of a properly glued biscuit joint far exceeds the strength of the wood.
I didn't believe it either.
Being a good engineer, I tested it out.
It's true.
You'll break the wood long before the joint fails.
Thanks for the video. Very cool! I get so manic over a project when I get the bug, but I have to be patient. I don't even have the picture done yet. I could do it bassackwards and make the frame first and hope the aspect ratio works, but I'm trying to resist. I took a look at some of Lik's stuff and I like his aspect ratio. I found it is a 3:1. So, if I do limit myself to 15 feet total (Maybe I'll make two), that gives me a maximum of 5'6" on the outside of the long edge and 1'10" on the outside of the short edge. Figuring the frame is about 5" roughly and I'm not using a mat, that gives a picture dimension of about 16"x48" and a outside frame dimension of 26"x58" (for a total linear dimension of 14 feet which also fits within the limits of the band clamp of 15').
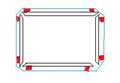
Courtesy of MS paint, here is the workingman's guide to one of those fancy schmancy band clamps.
A wee bit simplification may be achieved by planting mdf or plywood on the back to create a rebate, or rabett as you colonials would have it. If the more stable material straddles the mitre(s) then you simplify, stabilise and strengthen.
Biscuits might be the best bet for joining.....I used to work at a frame shop and we had a special cutter that would cut a "bowtie" into the two pieces. Then we had plastic bowtie pieces to put into it.
End grain miters do not glue up well especially with a distressed softwood like the fir you have. The endgrain sucks up so much glue that there isn't enough glue left to form a good bond. You need something to act as a connector beyond the glue. In many frame shops they use corrugated fasteners to make a mechanical connection.
Ratchet straps are great for getting compression, but I have created too many parallelograms once I came out to strip off after glue up. You need to brace the snot out of any frame, be it a picture frame, a door frame or a cabinet frame. Until it sets, glue acts as a lubricant, and compression bands don't care which direction they compress in. Something needs to insure that those corners stay at 90%
stick the picture on the wall and then fasten the wood around it to the wall (thru the studs). if its large it may work better, however if you ever plan to move it...
End grain miters do not glue up well especially with a distressed softwood like the fir you have. The endgrain sucks up so much glue that there isn't enough glue left to form a good bond. You need something to act as a connector beyond the glue. In many frame shops they use corrugated fasteners to make a mechanical connection.
Ratchet straps are great for getting compression, but I have created too many parallelograms once I came out to strip off after glue up. You need to brace the snot out of any frame, be it a picture frame, a door frame or a cabinet frame. Until it sets, glue acts as a lubricant, and compression bands don't care which direction they compress in. Something needs to insure that those corners stay at 90%
I seem to be having some experience like this. The bands wanna try to espace whichever way they can.
Let me say cutting miters on a piece of old wood that has warped in the sun for 20 years is not easy. I'm going to fudge it. I have the band clamp around the wood, but only the joints on one end glued. I'm going to let that set and then see what sort of wiggle room I have to custom cut the other end piece as best as I can. I may try to reinforce the glued joints first with either screws (predrilled) or something else. I'll let you know how it looks in the morning.
Easiest way to do what you're doing, actually, is to make a sub-frame out of good, square material then just overlay the weathered wood on top of that. Easy Peasy. That's how a lazy Bear would have done it anyway :-)