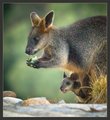
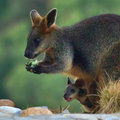
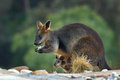
It has a lot of noise. I have now all NIK and Topaz plugins and CS5 but I have only started learning to use them.
What is the best way of PP on this image?
Here's what I was able to get from it with about 5 minutes of playing around. Might be possible to get a little more sharpness & detail with some more time and the use of a couple of other plugins.
-Levels
-Topaz Denoise
-Topaz Adjust (Modified Photo Pop preset)
-High radius USM for contrast
-Crop
-Resize
-Sharpen
Thanks, Steve. What settings did you use in Topaz Denoise? Is high radius USM done in Photoshop?
Originally posted by Yo_Spiff:
Here's what I was able to get from it with about 5 minutes of playing around. Might be possible to get a little more sharpness & detail with some more time and the use of a couple of other plugins.
-Levels
-Topaz Denoise
-Topaz Adjust (Modified Photo Pop preset)
-High radius USM for contrast
-Crop
-Resize
-Sharpen
I'm not sure this is better than yours - yours is sharper but suffers from some artefacting.
I started by desaturating the problematical magenta.
I then boost global saturation to maximise color differences between the wallaby and the background. I then used Color Efex Pro's Dynamic Skin Soften, picking the green to be smoothed adding removal control points onto the wallaby.
I then ran a skin smoothing brush over the background again.
I than used Viveza 2 to desaturate the wallaby coat, then added in some warmth (it had green patches to be removed). I then used Define with removal control points on the eyes and mouths.
I added some contrast and structure into feature-important areas and then did some Adamus sharpening.
Thanks, Paul. Magenta was baby's tongue! :) It was hungry
Your PP workflow is very interesting. Lots of good pointers on separating the subject from the background and local PP. What happened to the baby? Was it the result of Adamus sharpening? It looks grainy on my monitor.
Originally posted by paulbtlw:
I'm not sure this is better than yours - yours is sharper but suffers from some artefacting.
I started by desaturating the problematical magenta.
I then boost global saturation to maximise color differences between the wallaby and the background. I then used Color Efex Pro's Dynamic Skin Soften, picking the green to be smoothed adding removal control points onto the wallaby.
I then ran a skin smoothing brush over the background again.
I than used Viveza 2 to desaturate the wallaby coat, then added in some warmth (it had green patches to be removed). I then used Define with removal control points on the eyes and mouths.
I added some contrast and structure into feature-important areas and then did some Adamus sharpening.
Personally I think I prefer a slightly different crop but that wouldn't have met the challenge.
Thanks, Sarah. I agree with the crop. It puts them better in the environment.
Again, it is interesting to note the different approaches to PP. I am learning a lot from this! :)
With Topaz DeNoise, all it needs is a setting halfway between JPG Light and JPG Moderate; I forget the number, exactly, but that's what works. I didn't do any further processing, but the noise is not an issue. Then I went to bed without posting my research, sadly :-)
Thanks, Steve. What settings did you use in Topaz Denoise? Is high radius USM done in Photoshop?
I used the JPEG-Moderate preset. I find it is the appropriate balance of noise reduction vs detail retention for most images from my DSLR. Sometimes I will need to tweak some settings a little, but not much.
Yes, High Radius USM is done in your image editor. It increases local contrast in a more effective way than the contrast adjustment does. This is because sharpening really does not sharpen, it produces the impression of sharpness by increasing the contrast of edges. By using a large radius, you increase the contrast of everything. I use the following settings:
Radius: 100 Amount: 12 Clipping: 3
(I think Photoshop calls some of those settings by different names) I use the amount of 12 as a reasonable starting point, which provides a moderate, but visible change in contrast. I adjust the amount up or down as needed.
You don't need Noise Ninja; you have Topaz DeNoise. That's arguably the best noise-removal product out there, and certainly adequate to this particular job. As stated earlier, a setting halfway between JPG light and JPG moderate in optimum. If you don't want to make your own adjustments yet, JPG moderate is fine.