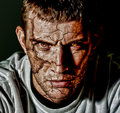
When adding the viens, I added them everywhere and then masked them out. When I changed the blending options to bevel and emboss, it did something funky to the edges around where I masked out ONLY, nothing to the actual veinds and cracks.
So I skipped that, and I changed the layer to multiple. Unfortunately, not enough of the skull is passing through and you can see my eye and mouth under where the skull should be. Any tips, advice...here are the images I worked with.
OK, just got in from work, but got your PM and thought I would reply in the thread so as to help anyone else. This will only skim over the issues, I will write a bit more in-depth later tonight (british time)
OK, the first problem you have got here is that your base face image does not match the skull, even though my shot isnt an exact match, my teeth are together rather like my skull image. Here your mouth is wide open so the teeth/jaw etc will never match properly so I think first off you will need to reshoot your base image, by all means add some expression, but be aware of the skull picture and what you have to work with. (as a sidenote, that picture of the skull was the exact same one I grabbed off google images for my first attempt at this project).
Next up, the veins/scars etc are the only parts that are on a layer other than normal.. The Skull AND face both need to be on NORMAL layers, then you have to mask out parts of the face to expose the skull below.
Have another shot, but feel free to email me again, I will go through this with you off-site if you want a step-by-step tutorial on it.. If you have Google "Hello" then maybe we could hook up and go through it together??
Yeah...working with other pictures of friends I see that people who have their mouths closed have it working for them better. Still, it seems that when I use the multiply layer, the skull becomes transparent enough for the that it looks translucent (sp?) and you can see a bit of the eye underneath both.
Also, the blending option, the bevel part...what's that suppose to do exactly. To me it looks like it's adding a border or some kind, but that's all. From what I read it was suppose to make the scars bumpy etc. Maybe I read wrong...
Right now I'm cool with playing around with it and figuring out a few things. I found that the overlay works well too.
I'm going to say that this is the BEST tutorial I've had the opportunity to use. I've been at this all day and all night...I dreamt zombies in my sleep...oh...so much fun and so much thanks for sharing. I will PM when I get stuck if you don't mind.
OK, heres my take on it, would of been a lot easier with your teeth together, but I think I managed to work around it.. not quite as good as previous efforts but this was a quick and nasty 10 minute job..
mine doesn't seem to want to blend as well. Your take looks like the skin has been ripped off the bone, mine just looks faded in. Is that where the bevel plays a role or am I still missing something?
Amazing...I've been play with it for the last 48 hours and still haven't come that close to it...here's a recent attempt with a friends face.
This one is miles better.. I think you have got the technique, its just a case of practicing. Believe me, I have LOADS of photoshop files from my earliest attempts.. The "Feeling Rotten" entry was a culmination of about 3 weeks research, practice & work.
Yes, the bevel gives the wounds a sense of depth.. or at least it should.
Just revisited this thread, some really great work in here. I have the tutorial on another site as well and they are banging out zombies like they are going out of fashion!
Great tutorial. I have one big question though. I can't find the 'tone mapping filter' anywhere. I'm running CS3. Am i just being an idiot, or is it actually called something else?
Hope you read this 'cos I know the thread is a year old.
In this tutorial two sets of brushes are mentioned. But I've found, that the URLs doesnt exist anymore.
If you have it, can you mail it to swisst@centrum.cz please?
Thanx