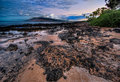
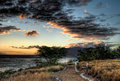
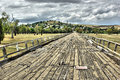
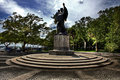
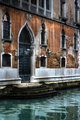
I think this is one of my favorite ones that Ive done HDR. I know the concept of HDR is to try and make it as real life as possible, but I just get a kick out of making things look gothic. In order to do so I use a single RAW file (CR2) and pump it through Photomatix. In photomatix I play with the settings quite a bit. The gothic look that I like is achieved by lowering the Gamma (slider to the left) quite a bit, and then using the other settings to make the lighting look balanced enough. After that Ill run it through photoshop where I sometimes use the Shaddow/Highlight function (although, I dont think I did on the photo below). Personally, I dont like to saturate things beyond what I remember them being in real life, but sometimes through the Photomatix processing it gets saturated a bit more anyways (depending on the photo I may even desaturate in photoshop). The photo below, and the other Venice photos in my portfolio, then had levels applied to them. Pretty basic, where I just slide the middle slidder (RGB) to the right about .1-.15 which makes the darks darker and the lights lighter (right?). Sharpen, crop, and save.
I really like this. My only recommendation is that the statue looks a bit dark and is silioutted (on my screen anyways, maybe just me though). So, if you do Image-Adjustmens-Shadow/Highlight, you could lighten up the shaddows and the statue details could be seen more.
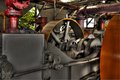
I shot this today at Gas Works Park in Seattle. I used 3 shots in Photomatix 3.1. One exposed properly, one 2 stops over, and one 2 stops under exposed. Used the detail enhancer tab. All adjustments done there.
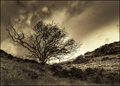
I use Photomatix for HDR and tone mapping, then PS for final edit, I prefer to work in mono/duo tones, color HDR is much more difficult IMO, always seems to be over saturated.
I shot this today at Gas Works Park in Seattle. I used 3 shots in Photomatix 3.1. One exposed properly, one 2 stops over, and one 2 stops under exposed. Used the detail enhancer tab. All adjustments done there.
FYI - If you use the image id and click the second icon from the right from the images that appear above the text box, ie this image - , 'Insert Thumbnail Link to Site Image' and use your id your thumbnail will appear as a link to your image like this :
Can I suggest that as this is a learning thread where possible you post your unedited "correct exposure" shot as well so we can see what has been achieved using HDR :)
I shot this today at Gas Works Park in Seattle. I used 3 shots in Photomatix 3.1. One exposed properly, one 2 stops over, and one 2 stops under exposed. Used the detail enhancer tab. All adjustments done there.
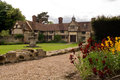
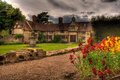
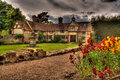
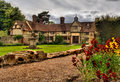
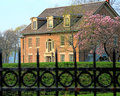
In keeping with the tutorial-aspect request...here's a shot I took at the weekend of Ightham Mote, a rather pretty 14th Century Manor House in Kent:
Original
Here are a couple of outputs straight from Photomatix - I had 3 exposures differing by 1 1/3 stops (I think):
Light Smoothing Level 4
Light Smoothing Level 3 (warning, sunglasses may be required)
In PS I combined these three layers, reducing the opacity of each, and toning down the effect further in certain areas (especially the flowers which went a bit crazy) - then a bit of dodge n burn to finish. Could have done a lot more but time constraints yada yada.
A bit of breeze made some of the vegatation a bit wobbly with 3 exposures after alignment. But you guys don't mind, right :)
I went to Photomatix so I could play along here, but there are many versions to chose from. Which one should I be looking at?
I believe the latest standalone has all the bells and whistles and should do whatever you want. I tend to create my HDR or EXR file in Artizen and tonemap with the Photomatix plugin for PS. I don't think I'm really answering your question though...
I went to Photomatix so I could play along here, but there are many versions to chose from. Which one should I be looking at?
I downloaded Photomatix Pro 3 Trial Ware and it works just fine, the full version is $99 but you can use the trialware as long as you resize your images before uploading them so the Photomatix logo doesn't show up in your finished image.
I really like the final product here...this is a great hdr. Question...the two where you did light smoothing level 3 and 4...are these two separate tonemapped versions that were produced and saved separately. I have never done it that way and i really like the outcome.
Originally posted by jimness:
In keeping with the tutorial-aspect request...here's a shot I took at the weekend of Ightham Mote, a rather pretty 14th Century Manor House in Kent:
Original
Here are a couple of outputs straight from Photomatix - I had 3 exposures differing by 1 1/3 stops (I think):
Light Smoothing Level 4
Light Smoothing Level 3 (warning, sunglasses may be required)
In PS I combined these three layers, reducing the opacity of each, and toning down the effect further in certain areas (especially the flowers which went a bit crazy) - then a bit of dodge n burn to finish. Could have done a lot more but time constraints yada yada.
A bit of breeze made some of the vegatation a bit wobbly with 3 exposures after alignment. But you guys don't mind, right :)
I really like the final product here...this is a great hdr. Question...the two where you did light smoothing level 3 and 4...are these two separate tonemapped versions that were produced and saved separately. I have never done it that way and i really like the outcome.
Well thank you! Yes I loaded in my 3 RAW files and tone-mapped the result with the Light Smoothing on Level 4 (what I'd normally use) and saved that, then undid the tone mapping and did the same but with the smoothing set to 3, then saved that as a separate file. In PS I copied and pasted so I had 3 layers in order of effect strength (original, Level 4, level 3) then did the opacity adjustments. Actually I'd normally just use level 4 but I quite like some of the stronger effect on the building, so I thought I'd experiment a bit...
I really like the final product here...this is a great hdr. Question...the two where you did light smoothing level 3 and 4...are these two separate tonemapped versions that were produced and saved separately. I have never done it that way and i really like the outcome.
Well thank you! Yes I loaded in my 3 RAW files and tone-mapped the result with the Light Smoothing on Level 4 (what I'd normally use) and saved that, then undid the tone mapping and did the same but with the smoothing set to 3, then saved that as a separate file. In PS I copied and pasted so I had 3 layers in order of effect strength (original, Level 4, level 3) then did the opacity adjustments. Actually I'd normally just use level 4 but I quite like some of the stronger effect on the building, so I thought I'd experiment a bit...
This is good stuff. Sometimes one tonemapping doesn't work for all parts of the photo. With my current Free Study I actually tonemapped in both Photomatix and Artizen and blended & masked in Photoshop. Also, playing with different blending modes can give interesting results.
thanks...great information...i use light smoothing at the highest level too, but never saved separate files. i will have to try that. does anyone keep track or save their tonemapping settings? i often thought i should...would be interested in hearing more...
Originally posted by jimness:
Originally posted by linny:
I really like the final product here...this is a great hdr. Question...the two where you did light smoothing level 3 and 4...are these two separate tonemapped versions that were produced and saved separately. I have never done it that way and i really like the outcome.
Well thank you! Yes I loaded in my 3 RAW files and tone-mapped the result with the Light Smoothing on Level 4 (what I'd normally use) and saved that, then undid the tone mapping and did the same but with the smoothing set to 3, then saved that as a separate file. In PS I copied and pasted so I had 3 layers in order of effect strength (original, Level 4, level 3) then did the opacity adjustments. Actually I'd normally just use level 4 but I quite like some of the stronger effect on the building, so I thought I'd experiment a bit...














 , 'Insert Thumbnail Link to Site Image' and use your id your thumbnail will appear as a link to your image like this :